
How to Make a Photo Look Professional
Achieve a polished, professional look for 2025—InstaHeadshots delivers fast, affordable AI headshots to help professionals and teams stand out online.

Transform your everyday photos into polished, professional images with proven editing techniques and smart AI tools.
A professional headshot can mean the difference between being trusted or overlooked. Whether you’re in law, real estate, healthcare, or finance, people form impressions in seconds, and a low-quality photo can quietly undermine your authority.
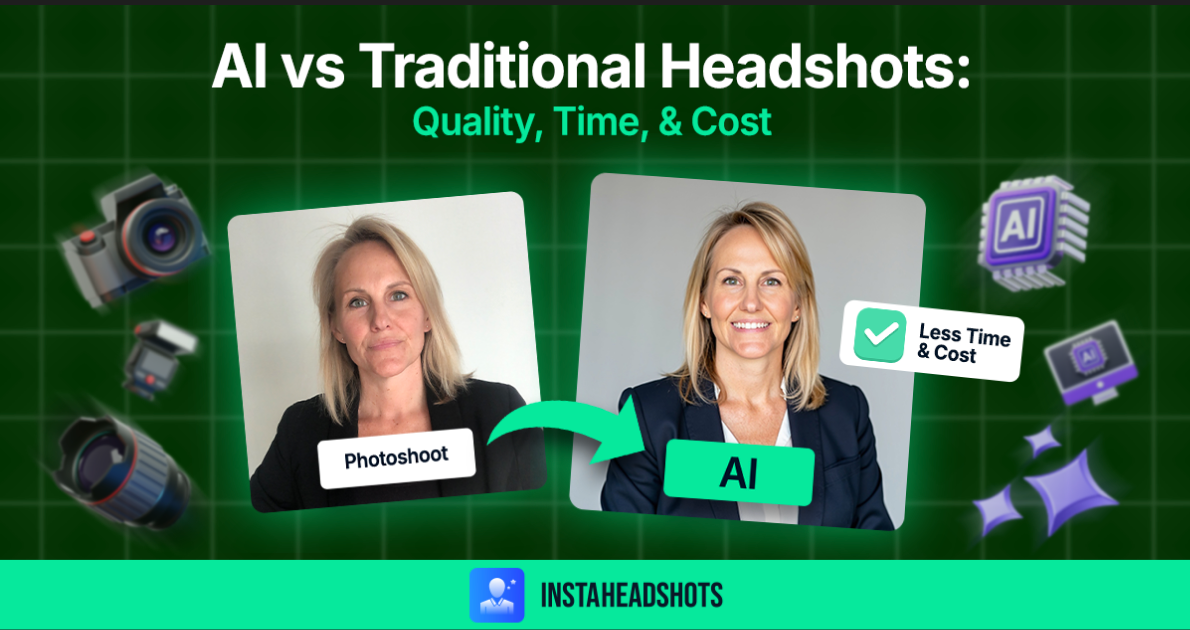
Most people don’t have the time, equipment, or skills to match the results of a trained photographer. That’s why AI-powered headshot generators are changing the game: They deliver the same polished look without the cost or hassle of a studio shoot.
At its core, a professional-looking photo comes down to five essentials: balanced exposure and contrast, accurate color, sharp focus, thoughtful composition, and subtle retouching. Nail these, and any image, whether taken on your phone or generated by artificial intelligence (AI), can set the right tone from the very first glance.
TL;DR: Free photo editing tools can help improve your images, but they take time, practice, and consistency. AI headshot generators like InstaHeadshots go beyond basic edits, applying professional photography standards automatically and delivering natural-looking, studio-quality photos in minutes—saving you the expense and scheduling stress of hiring a photographer.
What makes photos look professional
When you see a great headshot, it feels effortless. The lighting flatters, colors look natural, and your eye goes straight to the person rather than a cluttered background or distracting filter.
Experienced portrait photographers rely on a few simple principles that make images stand out, and once you know them, you’ll start noticing the difference right away.
The best part? You don’t need years of photography training to understand them. With a few basics, you’ll recognize why certain photos feel polished while others look “off.” Let’s walk through what separates a professional-looking headshot from one that feels unpolished.
Correct exposure and lighting
Lighting is the single most important factor in how professional a photo looks. If it’s too bright, facial details and clothing can disappear into blown-out whites. Too dark, and deep shadows make your features hard to see, especially in low light. Proper exposure means finding balance, so your skin isn’t washed out in bright spots or hidden in heavy shadows.
The effect is immediate. Balanced lighting makes a photo feel deliberate, not accidental. Even with simple smartphone selfies, small choices make a big difference, like standing a few feet from a window with curtains drawn for soft, even light.
Sharp focus on the subject
Even the best lighting won’t save a photo if the subject looks soft or blurry. In headshots, the eyes need to be tack-sharp—that’s what creates connection and clarity. If the background is in focus instead of your face, the photo instantly feels amateur. A shallow depth of field can help isolate the subject and improve overall image quality.
Fortunately, this is an easy fix. On most smartphones, tapping your face on the screen tells the camera where to focus. With a DSLR or mirrorless camera, set the focus point directly on the eyes and adjust the shutter speed for crisp results. A little extra care here ensures your eyes stay sharp, giving the entire headshot a professional, intentional look.
Accurate color balance
Nothing signals a low-quality photo faster than unnatural skin tones. A professional headshot should have natural, consistent color; skin shouldn’t look overly orange under indoor bulbs or too blue in outdoor shadows. When colors are accurate, the photo feels lifelike and trustworthy.
This comes down to white balance, the setting that corrects for different lighting conditions. While most cameras and phones adjust automatically, they don’t always get it right. If your photo looks too warm or cool, a quick correction in editing software like Photoshop or Lightroom can fix it. Balanced color makes your headshot look true to life, helping you appear confident and credible.
Thoughtful composition
A well-composed headshot feels intentional and guides the viewer’s eye straight to you. One of the simplest photography tips is the rule of thirds: Instead of centering yourself, shift slightly off-center to create balance and visual interest.
What’s behind you matters just as much. A cluttered or distracting background can pull focus away from your face and make the image look less professional. Before taking the shot, check for messy shelves, bright lights, or objects “growing” out of your head. Even small adjustments in angle or positioning can turn a casual snapshot into a career-focused portrait.
Consistent style and mood
A headshot might look fine on its own, but if it doesn’t match the tone and style of the rest of your images, it can stand out in the wrong way. If your headshot looks noticeably different in tone, color, or editing style from the rest of your team’s, it can seem out of place. Consistency signals professionalism and reinforces your personal or company brand.
That doesn’t mean your photo should look overly processed. Subtle edits go a long way, like gently brightening skin, softening shadows, or keeping tones uniform with a preset. The key is to stay natural while matching the mood you want to project: approachable, confident, trustworthy.
For consistency, apply the same preset or editing style across all your headshots so they match in tone and reinforce your professional image.
Common mistakes that make photos look amateur
Avoiding missteps is just as important as applying the right techniques. Even with good equipment or editing tools, small errors can make a headshot look amateur. Here’s where most people go wrong and how to fix it.
Over-editing and unnatural effects
It’s tempting to pile on filters or dramatic effects, but this almost always backfires. HDR can create glowing halos, aggressive skin-smoothing makes faces look plastic, and oversaturation pushes colors into cartoon territory.
The result is a photo that looks fake, filtered, or disconnected from how you actually appear. Skilled edits enhance reality, not replace it. Stick to subtle, basic adjustments that keep your image sharp, balanced, and true-to-life.
Poor composition choices
Composition can make or break a photo. Centering every subject creates stiff, lifeless images. Busy backgrounds distract from your face, and tilted horizons can make viewers feel off-balance.
The fix is simple. Frame with intention, using the rule of thirds for balance. Clear away distractions, and keep the horizon straight. These small tweaks make your photo look deliberate rather than accidental, resulting in a high-quality final product.
Technical quality issues
Blurry, grainy, or poorly focused shots give off “rushed selfie” vibes. Motion blur from shaky hands, noise from shooting in low light, or focusing on the background instead of your eyes can ruin an otherwise good photo.
To avoid this, stabilize your camera, use focus tools, and shoot in well-lit conditions. Paying attention to these basics improves image quality and signals professionalism immediately.
How to edit photos to look professional
Editing is where good lighting and composition come together. This is how you polish what you’ve already captured. Even if you’ve nailed the basics in-camera, thoughtful edits can turn a decent photo into a headshot that feels career-ready.
Start with the strongest original you can. Editing can enhance, but it can’t fully rescue a poor-quality image. Here’s a simple, step-by-step approach to making your photos look sharp, balanced, and credible.
Step 1: Crop and straighten your image
The first thing is to fix the framing. Tilted or poorly framed photos instantly look novice. Start by leveling your horizon. Most photo editors include a straightening feature. Then apply the rule of thirds: position your eyes about one-third down from the top of the frame and slightly off-center for a natural look.
Crop out distracting edges and choose the right aspect ratio for where the photo will live:
- 16:9 for websites
- 1:1 for Instagram
- 4:5 for LinkedIn
Step 2: Adjust exposure and contrast
Once your framing is in place, focus on light and depth. Exposure controls how bright or dark your photo appears. Lift shadows to recover detail in darker areas, reduce highlights to bring back blown-out whites, and add contrast to create depth. Keep edits subtle: small changes make the biggest difference. Overdoing it flattens the image, while balanced adjustments give your photo a realistic, refined look.
Step 3: Perfect your white balance
Next, correct your colors so skin tones look true-to-life. Indoor lighting often skews orange, while outdoor shade can lean blue. Use the temperature slider to warm or cool the image until skin tones look natural. Then adjust the tint slider to correct green or magenta casts. For a quick fix, try the white balance dropper on something neutral in the frame, like a white shirt or wall.
Step 4: Enhance sharpness and clarity
With the color set, bring out the fine details. Apply overall sharpening first (about 40–60% in most software), then use masking to target edges while avoiding noise in smoother areas like skin. Adjusting clarity or texture can boost midtone contrast, making features stand out without looking harsh.
Be aware that too much sharpening can create halos that make the photo look over-edited. A shallow depth of field can also enhance sharpness by isolating the subject from the background.
Step 5: Retouch imperfections
Finally, refine the details. A career-ready photo doesn’t mean airbrushed skin. It means authentic and polished. Use spot removal for small blemishes, sensor dust, or distracting elements in the background.
Healing tools can blend imperfections smoothly, while clone stamps handle larger objects. Apply skin smoothing with restraint so texture remains visible. Details like freckles or lines are part of what makes you look genuine and trustworthy.
Free editing tools for making photos look professional
If you want to handle editing yourself, there are plenty of free photo tools with professional-grade features. Each has its own strengths, so the right choice depends on your workflow and comfort level.
These programs can help you crop, straighten, adjust colors, and make subtle improvements. The trade-off is time: even simple edits require multiple adjustments, and keeping a set of headshots consistent takes effort.
That’s why more people skip manual editing altogether and turn to AI-powered headshot generators. Instead of spending hours fine-tuning every detail, AI applies the core principles of professional photography (balanced lighting, accurate color, consistent style) across every image.
InstaHeadshots’ free AI headshot generator makes this process even simpler. Upload a few selfies and get hundreds of studio-quality headshots in minutes, ready to use across LinkedIn, resumes, websites, and more.
And that leads to the bigger picture: why so many professionals now rely on AI headshot generators as their go-to solution.
Why professionals choose AI headshot generators
For many job seekers and candidates, a headshot is now as important as the resume itself. Your photo is often the first thing clients, recruiters, or colleagues notice before they read your credentials. Traditional shoots can deliver great photos, but they also mean high costs, long timelines, and the challenge of scheduling.
AI headshot generators offer a smarter alternative: speed, variety, and high-resolution results that match the quality of studio work. Here are a few ways professionals put AI portraits to use:
- LinkedIn profiles: A credible headshot builds trust before someone clicks “connect.”
- Company websites: Consistent portraits across your team without the headache of coordinating calendars.
- Job applications: A strong headshot reinforces your professional image alongside your resume.
- Social media: Present yourself with confidence across platforms without relying on casual or outdated photos.
Your image is part of your first impression. Traditional shoots can deliver great photos, but they also come with high costs, long wait times, and the stress of scheduling. AI offers a faster, easier way to get the same studio-level results.
InstaHeadshots sets the standard by combining speed with authenticity. It applies photography best practices automatically to create natural-looking headshots that actually look like you. Unlike generic AI tools, it preserves fine details like freckles, glasses, or hair texture so the results look credible and true to life.
Over 150,000 job seekers and professionals trust InstaHeadshots for consistent, studio-level portraits, including teams at Google, Microsoft, Amazon, and Goldman Sachs—because showing up with confidence starts with a great photo.
Don’t let an outdated or casual headshot hold you back. Put your best face forward with InstaHeadshots today.