DIY Tips to Take Professional Headshots at Home
Learn how to take a professional headshot by yourself using smart tools, practical setup tips, and expert strategies for looking confident and credible.


DIY headshot tips that actually work—plus a smarter alternative with InstaHeadshots’ AI-powered, professional-quality generator that delivers every time.
So, you need a professional headshot, but the thought of scheduling a photographer, choosing your wardrobe, and hoping for a good hair day feels overwhelming. If you’re a busy professional on a tight budget, traditional photoshoots aren't always realistic.
Taking your own headshot seems like the obvious solution: You’re the photographer, subject, and art director after all. And with the right approach, you get decent results. Smart positioning, proper lighting, and strategic editing can turn a simple smartphone setup into professional-looking images.
But even well-executed DIY attempts have limitations.
There’s an alternative that can help you sidestep common struggles that come with taking your own headshot: AI headshot generators.
Tools like InstaHeadshots deliver studio-quality results in minutes, creating polished, authentic headshots. With a few practical strategies for making your headshot look credible, you’ll be on your way to getting the job or landing more clients.
TL;DR: You can take good DIY headshots with proper lighting and stable positioning. But they require dozens of takes to get a result you’re happy with, and may still need editing after the fact. For most professionals, InstaHeadshots offers a smarter alternative, generating studio-quality results from casual phone photos and applying professional lighting and composition automatically in just 15 minutes.
What makes a headshot look professional (even when it’s DIY)
You don’t need a magic wand to take great headshots. Once you understand the visual principles that communicate confidence and credibility, you’ll know what to focus on when taking your own headshots.
There are a few key visual principles that separate decent headshots from truly great ones that ooze professionalism:
- Lighting: Even lighting eliminates harsh shadows under your eyes and chin, creating a smooth, polished look. Natural lighting from a large window or ring light gives you this effect without draining your wallet.
- Expression: Professional headshots capture genuine expressions rather than forced smiles or serious stares. Your eyes should look confident and approachable — more like meeting a new colleague than taking a passport photo.
- Background: Neutral walls, soft gradients, and subtle textures keep the focus on your face. Busy patterns and multiple light sources signal amateur photography.
- Composition: Professional framing includes the head and shoulders, with your eyes positioned in the upper third of the image. Proper cropping and positioning create visual authority.
These aren’t “photography secrets” — they’re achievable with a phone and a few adjustments.
While these elements need to be manually controlled in a traditional DIY setup, AI-powered headshot tools like InstaHeadshots automatically optimize images for the same standards.
The result? The same (or better) quality in half the time and a fraction of the takes
DIY headshot checklist: What you need to get started
You don’t need a DSLR camera or expensive studio equipment to take a good headshot. Most smartphones capture high-resolution images that rival traditional cameras when you control the basics: lighting, background, and positioning.
Essential equipment:
- Smartphone with portrait mode: Your phone’s camera is already capable of producing professional images.
- Natural light source: A large window provides the best, most flattering illumination.
- Clean wall or neutral-colored curtain: Simple backgrounds keep the focus on your face without distractions.
- Stable surface or basic tripod: Eliminates camera shake and allows consistent positioning across shots.
Optional upgrades:
- Ring light or softbox: Helpful for indoor shooting when natural light isn’t available.
- Photo editing app: Basic adjustments can make your final image shine.
The key is controlling your controllables, not accumulating gear. A smartphone positioned at the right angle with good lighting will outperform an expensive camera in poor conditions. Focus your energy on mastering setup and positioning, and the technical quality will follow.
How to take a professional headshot
You can absolutely take great headshots with your phone — it just takes some setup and patience. Here’s a step-by-step approach that maximizes your chances of nailing it on the first try.
Choose the right location and lighting
Location and lighting are important, but you don’t need fancy equipment to get it right. Natural light near a large window provides the most flattering illumination, creating the soft, even glow that removes harsh shadows under your eyes and chin.
Position yourself about three to six feet from the window, facing the light source. This distance prevents overexposure while ensuring your face receives consistent light. If you’re shooting during midday, sheer curtains can diffuse intense sunlight into the gentle lighting studios charge hundreds to produce.
Be sure to avoid:
- Direct sunlight that makes you squint and casts harsh shadows
- Overhead ceiling lights that create unflattering shadows under your features
- Mixed lighting sources that cause color inconsistencies
Tip: Your background matters just as much as lighting. Remember to choose clean, neutral walls or simple curtains without busy patterns. Cluttered spaces, multiple light sources, or shadow-heavy corners make images appear flat and unprofessional, no matter how well you’re lit.
Set up your phone for a stable, high-quality shot
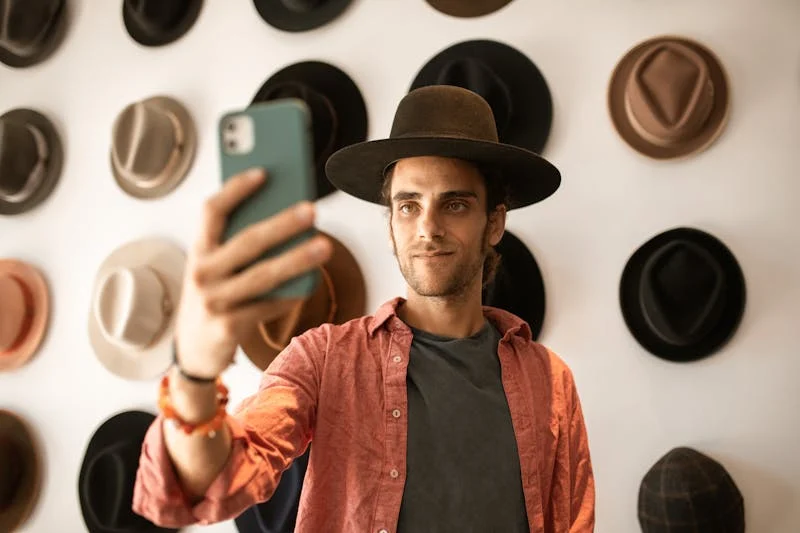
“I should use the front-facing camera for a selfie, right?”
Nope! A common misconception. Always use your phone’s rear camera, which produces sharp, detailed images at a higher resolution than the front-facing “selfie” camera.
A few other tips for setup success:
- Before shooting, clean your lens with a soft cloth. Smudges and fingerprints create a soft and hazy look—a quick wipe down will ensure you get professional results.
- Stability matters more than your gear. Position your phone at eye level using a basic tripod, or build a makeshift stand with stacked books, a high table, or even a kitchen counter. Eye-level angles feel more natural and authoritative. Shooting them from below makes you appear subdued, while shooting from above can look condescending.
- If your phone offers portrait mode, use it. This feature creates a subtle background blur that mimics professional headshot photography, separating you from the background for a more refined look.
Wear simple, professional clothing that fits your role
Your outfit communicates as much as your expression. Choose clothes that align with your industry and personal brand while keeping the focus on your face. Solid colors and clean lines photograph best, creating a look that won’t date your headshot or distract from your professional presence.
- Skip logos, busy patterns, or statement jewelry that competes for attention. These elements can make even high-quality photos look cluttered and unprofessional. Choose clothing that enhances your image without overwhelming it.
- Consider your industry as you choose colors and styles. Corporate professionals often go for authoritative choices: navy blazers, crisp white shirts, or sophisticated grays that signal competence and reliability. Creative service providers might choose softer options like cashmere sweaters in warm tones or approachable blues that convey accessibility and warmth.
The goal is simplicity. Clothing that looks expensive and well-tailored without being flashy. When in doubt, err on the side of understated elegance.
Adjust your posture and angle for a confident look
Body language speaks volumes—especially in professional headshots, where people form impressions in a split second. Research shows it takes as little as 1/10th of a second to form a first impression based on a photo. And that impression can be the difference between landing a client or getting passed over, securing an interview or getting lost in the pile.
Good posture sends a clear message: confident, competent, trustworthy. Slouching, on the other hand, can instantly suggest low energy, lack of attention to detail, or disinterest—none of which you want associated with your personal brand. Sit or stand tall with your shoulders back. You want to look poised, not stiff. Think “professional presence,” not “school photo day.”
Avoid facing the camera straight-on, which can come off as confrontational or flat. Instead, angle your body slightly while keeping your face toward the lens. This small adjustment adds visual dimension and helps you appear more relaxed and approachable, just like you would in a real-world conversation with a prospective client or hiring manager.
Keep your chin level, not lifted too high (which can feel arrogant) or dropped too low (which can seem unsure). A neutral, balanced head position combined with steady eye contact creates an impression of someone who’s grounded and confident.
Before shooting, practice a few poses in the mirror or with test shots. Small changes in posture or angle can dramatically shift how others perceive your professionalism and personality. In a virtual-first world, that perception may be your only shot at making the right impression, and it can directly influence whether someone chooses to work with you, hire you, or move on to the next profile.
Experiment with expression and take multiple shots
Making faces at the mirror before a headshot session isn’t silly. It’s how you discover your best look. Try different smile variations: a genuine closed-lip smile that conveys expertise, a natural open-mouth grin that radiates warmth, or a relaxed neutral expression that projects influence.
Each expression serves a different purpose. For lawyers and executives, subtle, confident expressions build rapport without appearing too casual. A warm smile invites connection and collaboration.
Shoot at least 10–15 photos to give yourself options. Expert photographers typically capture 50–100 shots during studio sessions to ensure perfect timing and expression. Your DIY session should be just as thorough! Even minor adjustments like lifting your eyebrows or changing your head angle by a few degrees can make a big difference.
Don’t settle for your first acceptable photo. You might strike the best expression after you’ve relaxed into the process and stopped overthinking each shot.
Frame the shot to highlight your face
Professional headshot photographers follow specific rules that instantly signal quality and intentionality. Keep your frame tight — head and shoulders only — to get the focused look you want in your LinkedIn profile photo and on your business website. Cropping removes distractions and makes your expression the focal point.
Leave adequate space above your head, roughly equal to the height of your forehead. Too little space makes the image feel claustrophobic, while too much space dilutes your presence and makes you appear smaller or less significant in the frame.
Avoid extreme close-ups that crop into your forehead or chin. These shots feel invasive and unprofessional. Likewise, wide shots that include your full torso soften the impact of your expression and compete with clothing or background elements.
Proper framing has a psychological impact beyond aesthetics. Tight, well-composed headshots command attention and respect, signaling that you understand professional standards and pay attention to details.
Edit your final pick for a polished finish
You can transform a good DIY headshot into a professional headshot with a little light editing. But restraint is important. Use beginner-friendly apps like Snapseed or Lightroom Mobile to make minor adjustments to enhance your natural appearance.
Focus on these basic corrections:
- Increase brightness to remove any muddiness.
- Adjust contrast to make your features pop.
- Add gentle sharpening to ensure crisp details around your eyes and hair.
These tweaks can correct small lighting inconsistencies and separate professional photos from selfies. Resist the urge to use heavy filters or aggressive skin smoothing. Over-editing can make you look fake or untrustworthy.
But even perfect DIY execution can miss critical details. Uneven skin tones, awkward shadows, or slightly off framing. These micro-flaws can make otherwise solid headshots feel too amateur for your LinkedIn profile, website, or press feature.
Common DIY mistakes to avoid when taking professional headshots
DIY attempts often hit these predictable roadblocks:
- Poor lighting creates harsh shadows under your eyes and chin, making images look unflattering or unprofessional.
- Slouched posture undermines confidence and authority, even with natural facial expressions.
- Cluttered backgrounds compete for attention and distract from your professionalism.
- Low camera angles distort facial features and create unsightly perspectives.
- Mixed lighting causes color inconsistencies that signal amateur photography.
- Timer rushes lead to awkward expressions caught mid-transition.
Are these problems fixable with patience and time? Sure. But coordinating every element is a hassle, especially for busy professionals. If you’re feeling overwhelmed, InstaHeadshots can deliver results you’ll be proud to show off.
Why professionals skip DIY and choose InstaHeadshots
Most people don’t have hours to experiment with lighting angles or reshoot until they get lucky — they need guaranteed results. InstaHeadshots eliminates the guesswork.
Using a few casual photos from your phone, our AI applies the same standards a photographer would: perfect lighting, optimal composition, and polished finishing. You don’t need a ton of time, fancy equipment, or years of expertise to get professional-grade results in minutes.
With InstaHeadshots, you get headshots that show your best self and meet the visual standards that build trust with recruiters, clients, and colleagues. Over 15,000 professionals choose InstaHeadshots for career-ready shots without the stress, learning curve, or uncertainty of DIY photography.
Get the best result for your new professional headshot without the stress
Whether you go the DIY route or embrace AI technology, you need a credible headshot that instills confidence at first glance.
InstaHeadshots understands that visual standards matter: flattering angles, confident posture, natural expressions, and balanced lighting. Trained on real professional portraits, our AI automatically applies the same technical expertise photographers spend years mastering.
Your image shouldn’t hinge on luck and perfect conditions. InstaHeadshots is here to help you look confident, competent, and current, minus the time pressures and budget constraints that make traditional photography stressful.
Get your professional headshot today!
InstaHeadshots has delivered over 4,392,249+ stunning headshots for 50,000+ professionals
We want you to know that you are in good hands. Our only promise is to leave you impressed with your headshots and come out happy on the other side.
Create your Headshots Now